3.) To add a softer less defined vein is to
"draw" or paint the veins in using clear water
in a damp/moist brush after the painted leaf
has had a little time for the paint to settle
and set up. It will be at a stage where it is
starting to loose its shine but is not dry.
"draw" or paint the veins in using clear water
in a damp/moist brush after the painted leaf
has had a little time for the paint to settle
and set up. It will be at a stage where it is
starting to loose its shine but is not dry.
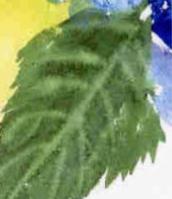
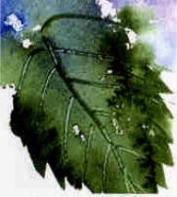
4.) When you paint the leaves you can add
veins as you go. The darker veins are scored
or scratched into the wet paint.
For the lighter veins wait until the paint has
settled and dried some but is still damp and
then scrape away some of the pigment
leaving the illusion of lighter veins.
veins as you go. The darker veins are scored
or scratched into the wet paint.
For the lighter veins wait until the paint has
settled and dried some but is still damp and
then scrape away some of the pigment
leaving the illusion of lighter veins.


| Click on the images below for larger photo references ~ Courtesy of Susie! |
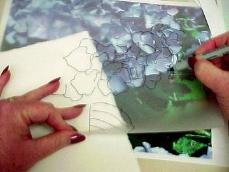
To make a pattern or line
drawing to work from, place a
piece of tracing paper or
transparency film over your
photo and trace the simple
lines or shapes.
drawing to work from, place a
piece of tracing paper or
transparency film over your
photo and trace the simple
lines or shapes.
This pattern can be moved and
adjusted to match your painting
and help you in finding the petal
shapes. Lightly outline these
shapes with a No. 2 pencil.
(HINT: If you use watercolor
pencils for this step you won't
have any pencil lines to erase!)
adjusted to match your painting
and help you in finding the petal
shapes. Lightly outline these
shapes with a No. 2 pencil.
(HINT: If you use watercolor
pencils for this step you won't
have any pencil lines to erase!)
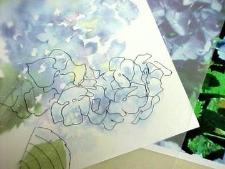
After the splattered blue paint
on the watercolor paper has
dried, the pattern is place
under the painting so the
shapes can be transferred
using a light box or window. As
you can see the pattern is
visible through 140 lb. CP paper.
on the watercolor paper has
dried, the pattern is place
under the painting so the
shapes can be transferred
using a light box or window. As
you can see the pattern is
visible through 140 lb. CP paper.
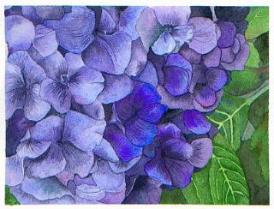
| FINISHING YOUR PAINTING: Adding definition and details by using both the positive and negative shapes will bring your hydrangea painting to life. This final step in the process is simple but time consuming because you are repeating it over the entire hydrangea bloom. Your painting can be as loose and splashy or as detailed as you want to make it. The hydrangea painting on the right is by one of my very talented online students. (Deb Leger, Canada) |
3
4
| Permission to print single copy for personal use only. (C) Copyright 2003 Susie Short Studio LLC ~ ~ www.susieshort..net |
Susie's Watercolor Tips -- Page 2 (back)