
| To return to my list of Watercolor Tips © 2002-2009 Susie Short Studio LLC All Rights Reserved Permission granted to print single copies for personal study. Enjoy! |
| Easy Tips for Painting Poinsettias in Watercolor Freehand (without a pattern) |
Here is a simple formula for painting pretty poinsettias without a complex or complicated drawing. Follow
these steps to paint your own versions of this popular Christmas flower. If you are new to watercolor this will
be a fun flower for you to paint! For more experienced painters add more interest and details by using a
variety of red hues to add depth and value. For this demo I'm painting on blank watercolor greeting cards
but regular 140# CP watercolor paper will give you similar results. I always recommend using good paper for
a good foundation. The results are worth the extra cost in the long run!
Need poinsettia photos with patterns? Visit Susie's Artstore click here |
Finishing touches: It's OK to leave the background white and unpainted. Or you may want to add
a sprig of holly or pine needles or a ribbon to your composition. Make it your own!
a sprig of holly or pine needles or a ribbon to your composition. Make it your own!
Here are some interesting poinsettia facts:
The colorful parts of the poinsettia are called bracts, while the true flowers are the small yellow centers.
Some poinsettias have loose airy centers while other types are compact and grouped tightly together.
Bracts come in white, pink, peach, yellow, marbled or speckled, as well as the traditional red. Poinsettias
are not poisonous or toxic but I still don't recommend eating them.
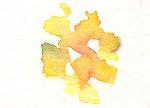
Step 1: On dry paper, start by painting a cluster of yellow dots for the centers
of the poinsettia. While the paint is still wet you may want to drop in some red or
green paint into the yellow and allow the paint to mingle. I like to let the edges
touch so the paint moves and mingles around more.
of the poinsettia. While the paint is still wet you may want to drop in some red or
green paint into the yellow and allow the paint to mingle. I like to let the edges
touch so the paint moves and mingles around more.
(Optional step: Allow the paint sit for 30
seconds or more then blot away the
excess moisture. This not only speeds up
the drying time it can also add some nice
texture.)
seconds or more then blot away the
excess moisture. This not only speeds up
the drying time it can also add some nice
texture.)
Tip: The bracts will look more natural
if they are not too uniformly spaced,
in other words, leave unequal space
between them.
if they are not too uniformly spaced,
in other words, leave unequal space
between them.
While you are adding the
red bracts you may want to
add some veins by softly
scratching into the wet
paint with the end of your
paint brush or a stylus. A
tooth-pick will also work!
red bracts you may want to
add some veins by softly
scratching into the wet
paint with the end of your
paint brush or a stylus. A
tooth-pick will also work!
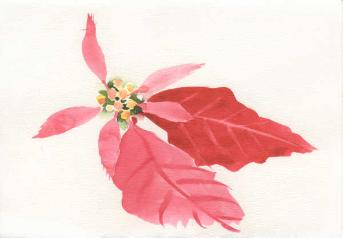
Step 4: Continue to add more bracts getting larger as you go. Some of the
larger bracts might also have a notch on each side. For added interest,
some red bracts might have green veins and some green leaves could have
red veins. Glazing (adding a darker layer of paint) over dry areas near the
center will add depth and shadows for a layered look.
larger bracts might also have a notch on each side. For added interest,
some red bracts might have green veins and some green leaves could have
red veins. Glazing (adding a darker layer of paint) over dry areas near the
center will add depth and shadows for a layered look.
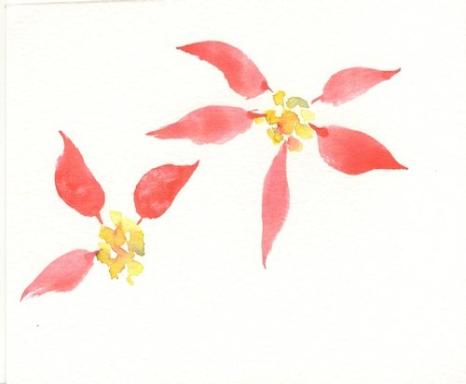
Step 2: Next, using slightly diluted red watercolor
paint the smaller new bracts. I usually start with
3 to 5 of these smaller petal shapes scattered at random
around the yellow center. By using diluted color they will
dry lighter, allowing you to paint the next row darker.
paint the smaller new bracts. I usually start with
3 to 5 of these smaller petal shapes scattered at random
around the yellow center. By using diluted color they will
dry lighter, allowing you to paint the next row darker.
Tip: We will be adding darker color behind the
centers so don't get too dark too soon.
An option is to paint the darker colors around the
yellow centers at this stage, even before adding the
larger bracts in the next step. Or you can wait and
add the darker colors after you have painted more
bracts.
centers so don't get too dark too soon.
An option is to paint the darker colors around the
yellow centers at this stage, even before adding the
larger bracts in the next step. Or you can wait and
add the darker colors after you have painted more
bracts.

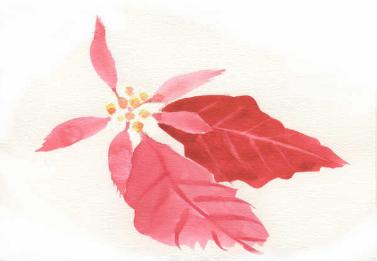
Step 3: When the first smaller bracts are dry continue by adding more petal shapes getting larger as you
paint the next layer or row of bracts. These can be painted using more paint so they are a darker value near
the center of the flower. Placement of the medium sized bracts can be between the smaller bracts or behind
them as illustrated in these examples. I often leave a little white space between the shapes to help separate
them.
| Step 5: If you haven't painted the darker shapes around the yellow flowers in the center of the poinsettia now is the time to add those darks. See the enlargement for details. |
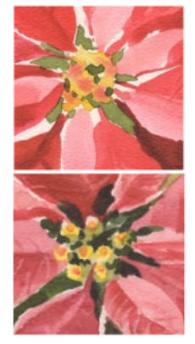
The illustration above shows some additional ideas for adding a variety of veins to your bracts. After you
have painted as many bracts as you need for the poinsettia to look full you can add a few lush green bracts
for contrast and balance.
have painted as many bracts as you need for the poinsettia to look full you can add a few lush green bracts
for contrast and balance.
Examples of poinsettia cards in progress
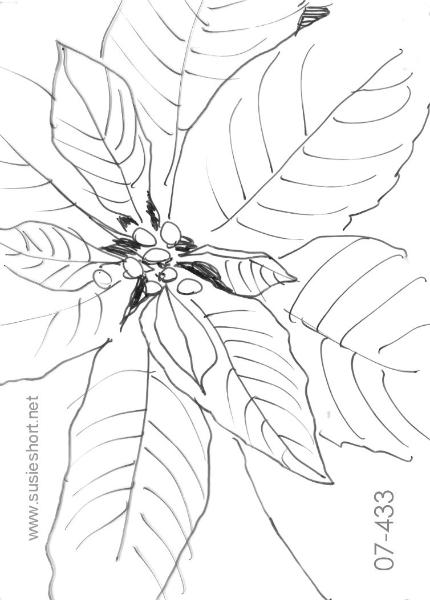

Here is a free 5 x 7 poinsettia pattern for you to print and transfer
to your watercolor paper or greeting card. You can use it either horizontal or vertical.
to your watercolor paper or greeting card. You can use it either horizontal or vertical.
You can use graphite paper
placed between the line drawing
and the watercolor card or paper
but I find this method of
transferring to be a little messy.
I prefer to place the drawing under
my card or paper and place it on
a light box or hold it up to a
window and let the light shine
through it. Its amazing how clearly
you can see the lines through the
paper. Use a light touch to trace
the lines so they can be easily
erased when you complete your
card.
Have fun! And if you paint this
poinsettia or one like it I'd love to
see it! Email it to
susie@susieshort.net
and I'll add it to my pretty
poinsettia's painting page.
Happy Painting!